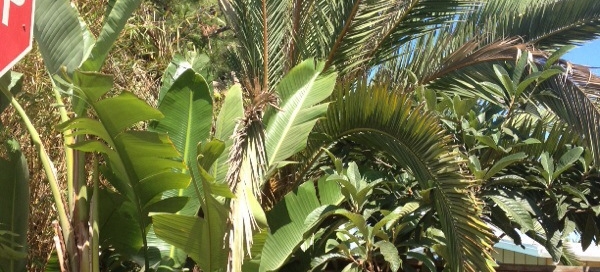
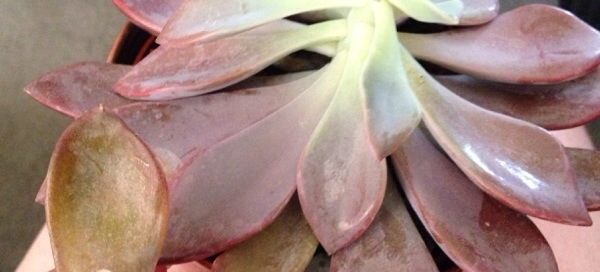
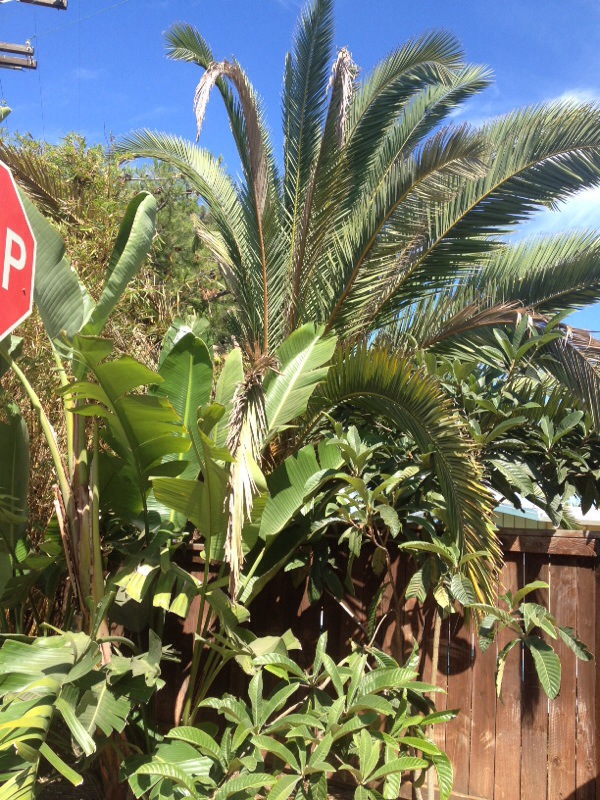
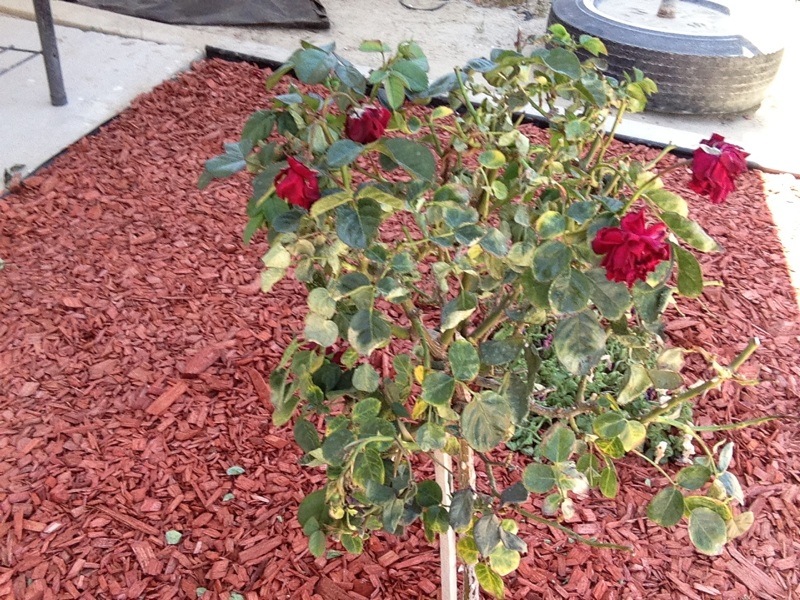
Plant Diseases

/Plant Diseases

Palm Rot

This may be Pink Rot, which leads to Fusarium Wilt. This is a common and devastating palm issue in Southern California, It's more problematic in Coastal Communities. Here is some info: http://ucanr.edu/sites/sjcoeh/files/77094.pdf
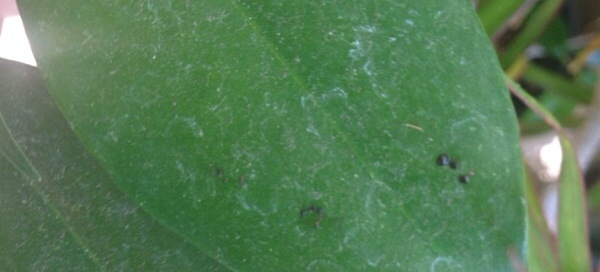
There is lits of information online about the disease and how to recognize it. Usually the half a front is living and the other half is dying is the best cue. There are no other issues that would cause half the palm fronds leaflets to die.
If it is this disease there are no cures. It would have to be carefully removed to not spread more spores throughout your area. It is best to have the county entomology office sample it in their lab for positive ID. There is a trick to test it in the field, but not as good as a formal lab test. If you cut a piece of the area that appears to be diseased, but still has living tissue put it in a a ziplock bag and seal tightly. Keep it in a shady location for a couple of days and watch the cut side of the palm tissue daily. If it has Pink Rot it will change from a white or cream colored tissue to a pink or peach color. It is carried in the wind and can enter a palm from simply cutting fronds. Its always best to only prune dead palm fronds as cutting living palm tissue will expose them to this deadly disease. Many chainsaws spread the disease since they can't be sterilized properly like hand saws can be. It can take many years before a Palm shows systems and dies. Sometime so much time goes by that understanding it was from a trimming years ago that infected it isn't always realized.
It would be best to contact your county entomologist or university cooperative extension office for further help and positive identification.

By | 2015-11-13T20:36:12-08:00 November 26th, 2015|Plant Diseases|0 Comments

Potential Bacterial Infection

This is a very unusual example. We believe it to be a bacterial infection however they are usually not seen in a perfect bad around the plant. The top looks remarkably healthy so there are 2 things to consider. When did this show up? If it was a long time ago say a year, then I wouldn't worry about it as it appears to have overcome the problem. If it has just shown up somewhat recently then you need to take some drastic measures. That would be severing the healthy part from the diseased part. Start by cutting straight through about 3" above the black area. If the cut on the top piece looks nice and white / green and no signs of brown, then you have a healthy cutting. If you are still seeing some discoloring, cut off another inch. You can repeat this as necessary until you hit healthy tissue, and sterilize the knife between cuts. Dust the healthy cut surface heavily with ground cinnamon, it is a natural antibacterial. Let your new healthy cutting sit somewhere cool and out of the sun for about 10 days. Then plant it in a new pot that's not too big with new cactus soil, and do not water it for another 10 days. Then you can give it a thorough watering and do not water again until the soil has become nearly dry. All of the parts of the old plant should be disposed of including the soil and the pot - You could sterilize the pot by soaking it in a 10% bleach and water solution so that you can reuse it for something else. It is way too big to use for the new cutting.

By | 2015-11-25T21:28:22-08:00 November 25th, 2015|Plant Diseases|0 Comments

Spruce Needle Cast

There are a few possibilities here, and without culturing in a lab or looking with a microscope it's impossible to know for sure what's causing the problems you see on your spruce tree. There are two needle cast diseases that cause the older spruce foliage to turn purple or brown and then die. Stigmina needle cast and Rhizosphaera Needle Cast. Both can be severe problems for spruce and treatment is difficult. You would need a definite diagnosis from your local extension service or a certified arborist, and treatment with a fungicide labeled for the fungus you have is usually done in the spring.

Spruce can also lose needles due to drought and many parts of the Northeast were dry this past summer and early fall. Sometimes drought works in combination with other situations such as spruce spider mites and the damage seen is a result of the two things combined. Yellowing needles on spruce can be caused by too dry, too wet, or soil that is too compact such as areas where recent activity from construction machinery have pressed soil into place.

If this spruce is recently planted, and it was a balled and burlaped plant, that too might be playing a role because B&B plants have had a great deal of their roots cut off, and the plant will drop the older needles if it doesn't have the root system to sustain all the plant.

If this is an important plant in your landscape you might want to have a certified arborist come and look at it.

By | 2015-11-25T13:33:26-08:00 November 25th, 2015|Plant Diseases|0 Comments

Wilting Rose Bush

Your rose bush could be suffering from both the high temps and dry air, and/or too much water. When a plant is first planted in the ground, it does need to be watered well at the time of planting, but then it should be watered according to its needs after that; always avoid over-watering. Roses, once the root systems are established, only need water once or twice a week in summer, but they like to be watered deeply - so water less frequently but put enough water out to make sure it travels deeply in to the soil and reaches the growing roots when you do water. Unfortunately, the high temps and dry air make it difficult for a newly planted plant to get a good start, and we can understand why you're watering it every day, but that's probably too much water for the not yet established root system. Over-watering can cause plants to wilt as well. If the plant is getting more than 3-4 hours of shade during the day, this can also slow down water uptake. Besides, Roses do best in full sun for 6-8 hours per day. If the soil is moist (or wet) now, don't water again until it has evaporated and begins to dry out in the upper few inches of top-soil. When the temps cool down, you definately should not water the rose every day. Hopefully it will recover from the extremes and the leaves will stop drying out, and the flowers will stop wilting. Here's a link to everything you need to know about Roses from the University of CA. http://www.ipm.ucdavis.edu/PMG/PESTNOTES/pn7465.html

By | 2017-09-11T15:49:33-07:00 November 23rd, 2015|Plant Diseases|0 Comments

Magnolia Leaf Drop

Your Magnolia is clearly under stress. Here are several possible causes based on what we can see in the photo. Although deer damage is possible, one way to tell if damage is from deer is that the damage is deer height, the lower portion of the plant. Upper regions beyond their reach are often left untouched. We can't see the top of the Magnolia to verify if the upper leaves are intact. However, if the leaf drop is throughout the tree, while there may be some deer damage, overall leaf drop suggests the problem stems from other causes such as the tree not receiving enough or too much water or nutrients. Magnolia like to be kept moist, even when dormant in the winter. A layer of several inches of organic mulch helps retain moisture and helps minimize soil temperature extremes. If your Magnolia isn't in a drip irrigation system, you'll want to make sure that it receives regular water. Newly transplanted trees can suffer stress if they dry out.

Magnolias also prefer acidic soil. The soil in your area is usually alkaline. You may want to contact the nursery or vendor where you purchased the tree for their recommendations on soil amendments specifically for Magnolia. While these beautiful trees do have some pests that can bother them, healthy plants tend to be less bothered by them.

As a fairly new transplant, your tree is still adapting to its new planting site. Some of the suggestions provided may improve your Magnolias overall health. Some leaves appear to be returning already! If your tree doesn't respond to these changes, you may want to contact either the nursery or vendor where you purchased the tree or your local extension agency for more specific help. Here's a link to the Nevada Extension Agency - http://www.unce.unr.edu/

Here's a link for more information on general Magnolia care, including fertilization - http://www.gardeningknowhow.com/ornamental/trees/magnolia/magnolia-tree-care.htm

By | 2015-11-23T08:00:40-08:00 November 23rd, 2015|Plant Diseases|0 Comments

Stretched Echeveria

You have an Echeveria that is really suffering because of poor conditions. It is stretching and losing its color because it is not getting enough light - It looks like it is also way overwatered. It's difficult to bring them back to normal at this stage so here's what you can do - bare with me! First, stop watering. The very lowest leaves are goners so just pull off and toss. Take a look at the overall length of the stem from soil level up to the top. Cut the head of the plant off about half way up that stem. It should leave you with a stem in the pot with a few large leaves attached, and the decapitated rosette in your hand. Move the pot with the original stem to an area that receives very bright light, even a bit of direct morning sun. Don't water that pot again until the soil has become fairly dry. When it has, you can water again. This is the way you typically want to water succulents, letting the soil dry out a bit before watering again. With any luck, in a few weeks you should see some tiny new rosettes forming on that old stem and you're home free. It should grow as a multi-rosette plant, and if you keep it in the brightest, slightly sunny spot you have, it should color up, grow more compact and rose-like. Now for the heat you have left over, remove a few of the larger lower leaves and save them, giving your rosette just a little stub of a stem on the bottom. Stick it and the few saved leaves and put them on a paper plate and put them somewhere out of the way for about a week so they can callus over their cuts - I usually stick them on top of the refrigerator so I don't forget them. after the week, prepare two small new pots with new potting mix that drains well. Gently just snuggle the little stub of the rosette into the soil of one pot, and lay the leaves on the soil of the other pot with their skinny ends just touching the soil - they sometimes do this easier if you lay them upside down. Now, for both pots, back on the fridge or wherever, out of the sun, and no water - just dry soil. Leave about another week or so and by then you should start to see new roots on the leaves and the same thing should be happening on the rosette stem. NOW give them a good drink and move them to the brightest location - avoid full sun for a while until they get going. Water them as I had mentioned before allowing the soil to dry out slightly before watering again. If the Plant Gods are with us, you will wind up with at least one healthy plant to start with again, but likely you'll have several plants after awhile - GOOD LUCK!

By | 2015-11-22T17:21:36-08:00 November 22nd, 2015|Plant Diseases|0 Comments

Epinasty Of Tomato

This is not likely an infectious disease, but it appears that the branches and leaf petioles (leaf stems) are turning downward. This downward turning appears to be an abiotic, non-infectious, disorder called Epinasty. This can be caused by various things, but its usually caused by either a malfunctioning heater in a greenhouse, or anaerobic soil conditions, in which the soil holds too much water and not enough oxygen for the roots to function properly. This can cause plants to produce a gaseous hormone called Ethylene, which is the actual cause of the downward turning of the plant parts. We've included a quote from the Plant Physiology Journal, as well as the link to this article for your reference. We recommend that you cut back on your water applications, and only water to keep the soil evenly moist. Weather conditions may dictate more water during some weeks, and less during others. A moisture meter may be a good tool to use. You can get these at many garden centers. Tomatoes like deep watering, fewer times per week; but since you have the plant in a container, you'll just want to water until drainage occurs from the bottom of the pot, but don't water too often. This downward turning cannot be corrected, but you can still get the plant to produce, if proper care is provided. We've also included a link (the last one below) with some information from the UC for your reference.
From: http://www.ncbi.nlm.nih.gov/pmc/articles/PMC1091906/
"....... results indicate that deprivation of O2 to the roots is the primary effect of soil flooding, and that this is sufficient to cause increased ethylene synthesis in the shoot."
Tomato care at this link..... http://www.ipm.ucdavis.edu/PMG/GARDEN/VEGES/tomato.html

By | 2015-11-13T20:31:23-08:00 November 20th, 2015|Plant Diseases|0 Comments

Botrytis Blight

There are several leaf diseases that tomatoes are prone to and without culturing in a lab it's hard to say which one is affecting your plants. This seems to be gray mold (botrytis). No tomato varieties have resistance to botyrtis, and once they get it, they can't be cured.
That said, the treatment for the home gardener is as follows:
1. Pull off the leaves that are infected so the plant can be better monitored and some of the spores are removed.
2. Never get the foliage wet when watering. It's amazing how many people routinely spray the leaves of plants every evening because they think that they are somehow "refreshing" the plant. This is a prescription for every leaf disease in the book. Instead, water deeply less often, trying to do so in the morning so that the foliage has plenty of time to dry.
3. Start spraying immediately with a copper fungicide - this is an organic treatment that is a bit stronger than other organic fungicides. If the garden is right next to a pond, lake or stream, however, do not use copper as it is toxic to aquatic life. (In such cases I would use Actinovate, a natural bacteria.) Spray under the leaves and the stems too. Although the fungicide won't "cure" the problem it can protect the newer growth long enough so that tomatoes can be harvested. Next season start spraying early first using something like Actinovate or Seranade, and switching to the copper once the plant has a problem. (Do not alternate these - the copper will kill the bacteria in the other two products.) Always start with the mildest of treatments for plants.
4. Next season plant your tomaotes in a different location than the previous year (crop rotation) and mulch your plants as soon as you plant them so that no fungal spores will splash up on the foliage when it rains.
5. Many people ask if they can "treat the soil" to get rid of such diseases, but most are not only soil-borne but also wind-borne so usually it's not helpful to apply a fungicide to the ground.

By | 2015-11-20T18:48:30-08:00 November 20th, 2015|Plant Diseases|0 Comments

Septoria Leaf Spot

This is Septoria leaf spot which is caused by a fungus, Septoria lycopersici. It is one of the most destructive diseases of tomato foliage and is particularly severe in areas where wet, humid weather persists for extended periods.
Integrated Pest Management Strategies

1. Remove diseased leaves. If caught early, the lower infected leaves can be removed and burned or destroyed. However, removing leaves above where fruit has formed will weaken the plant and expose fruit to sunscald. At the end of the season, collect all foliage from infected plants and dispose of or bury. Do not compost diseased plants.

2. Improve air circulation around the plants. If the plants can still be handled without breaking them, stake or cage the plants to raise them off the ground and promote faster drying of the foliage.

3. Mulch around the base of the plants. Mulching will reduce splashing soil, which may contain fungal spores associated with debris. Apply mulch after the soil has warmed.

4. Do not use overhead watering. Overhead watering facilitates infection and spreads the disease. Use a soaker hose at the base of the plant to keep the foliage dry. Water early in the day.

5. Control weeds. Nightshade and horsenettle are frequently hosts of Septoria leaf spot and should be eradicated around the garden site.

6. Use crop rotation. Next year do not plant tomatoes back in the same location where diseased tomatoes grew. Wait 1–2 years before replanting tomatoes in these areas.

7. Use fungicidal sprays. If the above measures do not control the disease, you may want to use fungicidal sprays. Fungicides will not cure infected leaves, but they will protect new leaves from becoming infected. Apply at 7 to 10 day intervals throughout the season. Apply chlorothalonil, maneb, macozeb, or a copper-based fungicide, such as Bordeaux mixture, copper hydroxide, copper sulfate, or copper oxychloride sulfate. Follow harvest restrictions listed on the pesticide label. An organic spray would be one containing Bacillus subtilis. It should be sprayed on the plant leaves every 7 days. It should be applied to the undersides of the leaves as well since that is where the fungus resides.

Organic Strategies

Strategies 1, 2, 3, 4 and 6 are strictly organic approaches. Using an appropriate organic herbicide (or removal by hand) would be viable organic approaches to Strategy 5.
There are tomato resistant varieties. Check you favorite seed catalogs for those varieties
Please get a second opinion if you don't agree.

By | 2015-11-20T17:12:19-08:00 November 20th, 2015|Plant Diseases|0 Comments

Artillery Fungus

The artillery fungus, Sphaerobolus spp. may become problematic in mulch, due to the production and release of its spores. This fungus produces very small, inconspicuous cup shaped fruiting bodies (about 1/10 of an inch) that contain a dark round spore body (peridiole). The accumulation of water and nutrients in the fruiting body eventually leads to a pressure release of the spore. That spore is shot toward any light source up to a distance of several feet. With windy conditions, spores can travel even further. When they land on light colored siding, building foundations, or cars, the material can be very unsightly. The spore bodies have a very sticky substance on them which can make removal extremely difficult. Soap and water with a scrub brush can be effective, before the material gets dry. Increased reports of artillery fungus causing problems may be due to use of hardwoods in mulch, excessive rainfall, or irrigation of foundation plantings. Artillery fungus may be more problematic on the north side of buildings where shade maintains more moist conditions. The use of bark mulch or pine bark nuggets rather than hardwood may provide a less favorable substrate than hardwood mulch for artillery fungus. Use of mulch derived from trimming of dead and diseased trees should be avoided. Adding fresh mulch yearly can also suppress the fungus, but plantings should not be mulched too deep. Removal or raking of infested mulch to disturb the growth of the fungus may help. Dr. Don Davis of Penn State University has a web site with more information and answers to frequently asked questions: http://www.personal.psu.edu/faculty/d/d/ddd2. Dr. Davis and his colleagues have done recent research indicating that the use of fresh mushroom compost blended with landscape mulch, at the rate of ≥40%, can be effective in reducing or suppressing the artillery fungus. This can be a good strategy in sites that have had problem with artillery fungus previously. Addition of the fresh mushroom compost adds organic matter, a rich dark color, and beneficial microbes that may compete with the artillery fungus offering some control. For more information, see the UD Plant Clinic Web site: http://extension.udel.edu/ag/plant-diseases/ud-plant-diagnostic-clinic/ or contact your County Extension Office.

By | 2017-09-11T15:49:34-07:00 November 20th, 2015|Plant Diseases|0 Comments