Onionweed Asphodelus Fistulosus
Asphodelus fistulosus
Family: Asphodelaceae (ASPHODEL, ALOE), Liliaceae (LILY).
Asphodelus fistulosus
Family: Asphodelaceae (ASPHODEL, ALOE), Liliaceae (LILY).
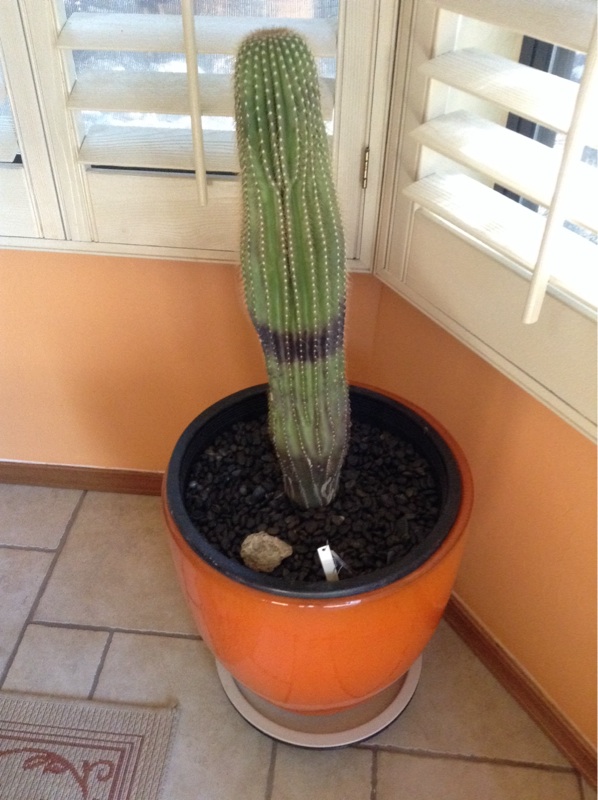
This is a very unusual example. We believe it to be a bacterial infection however they are usually not seen in a perfect bad around the plant. The top looks remarkably healthy so there are 2 things to consider. When did this show up? If it was a long time ago say a year, then I wouldn't worry about it as it appears to have overcome the problem. If it has just shown up somewhat recently then you need to take some drastic measures. That would be severing the healthy part from the diseased part. Start by cutting straight through about 3" above the black area. If the cut on the top piece looks nice and white / green and no signs of brown, then you have a healthy cutting. If you are still seeing some discoloring, cut off another inch. You can repeat this as necessary until you hit healthy tissue, and sterilize the knife between cuts. Dust the healthy cut surface heavily with ground cinnamon, it is a natural antibacterial. Let your new healthy cutting sit somewhere cool and out of the sun for about 10 days. Then plant it in a new pot that's not too big with new cactus soil, and do not water it for another 10 days. Then you can give it a thorough watering and do not water again until the soil has become nearly dry. All of the parts of the old plant should be disposed of including the soil and the pot - You could sterilize the pot by soaking it in a 10% bleach and water solution so that you can reuse it for something else. It is way too big to use for the new cutting.
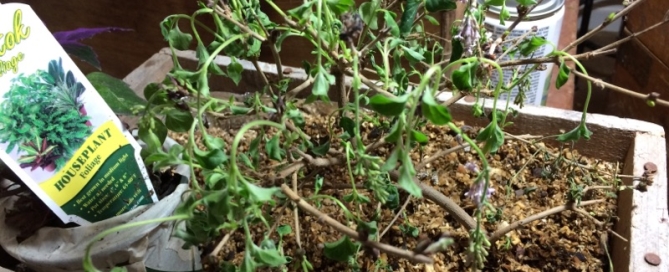
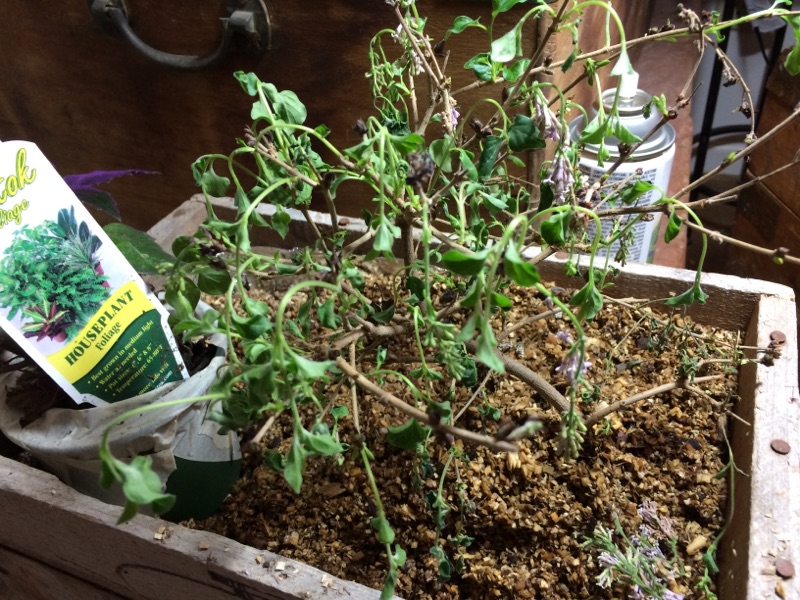
Although it's impossible to say for sure what happened to your lilac, here are some of the things to think about when a plant looks like yours.
1. Plants usually droop like this from either too much or too little water. To little and they can't keep their stems straight, and if it's too much their roots rot and so can't absorb the water they need for firm stems, leaves and flowers.
2. Did you put this in a container that has a drainage hole? If not, it might be too wet. Did you water the entire plant well, let it drain, and then water again once the soil felt dry? Sometimes people error by giving a plant just a little water (because they are afraid of over-watering) but a little water isn't enough to moisten the entire root ball and surrounding soil.
3. Did you pot this in good quality potting mix? The color and texture of what we see in this photo look odd - like maybe it's peatmoss, woodchips, or vermiculite instead of potting soil. If so, remove it from this material and repot using new potting mix.
4. Did anything get sprayed or dumped on the plant before or after you potted it? Hot water, perhaps? This will kill the roots so the plant will look as if it is dry and wilted.
Additionally, lilacs usually do best when planted outdoors in the summer or fall and left to grow with a dormant period. Keeping one alive indoors is challenging under the best of circumstances. lilacs are prone to powdery mildew and while it's unlikely that this would kill a plant, and it's a cosmetic problem on established lilacs, that on a young plant inside it might weaken the growth.
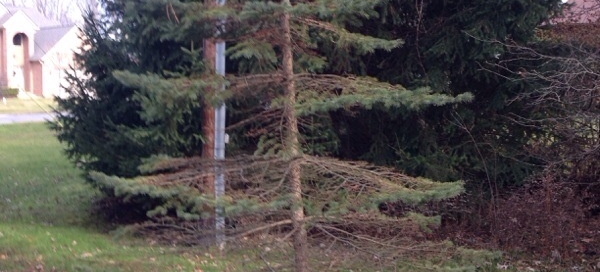
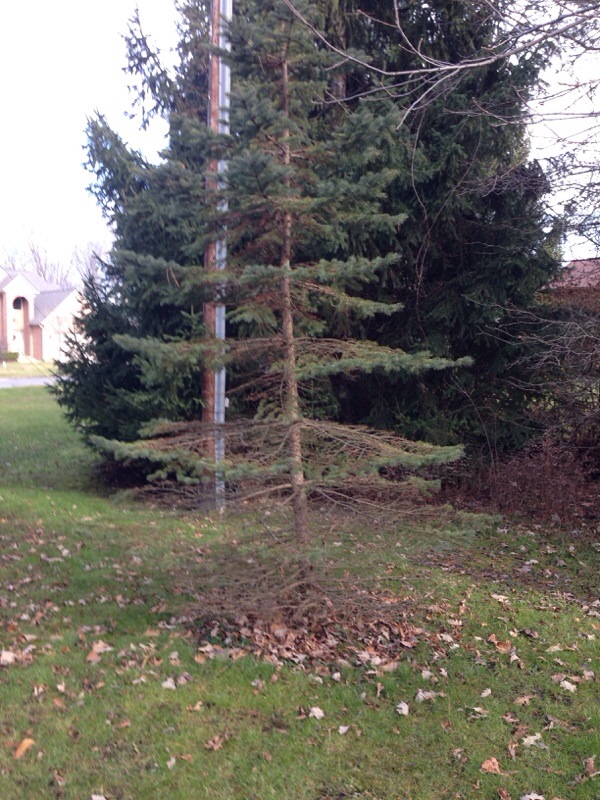
There are a few possibilities here, and without culturing in a lab or looking with a microscope it's impossible to know for sure what's causing the problems you see on your spruce tree. There are two needle cast diseases that cause the older spruce foliage to turn purple or brown and then die. Stigmina needle cast and Rhizosphaera Needle Cast. Both can be severe problems for spruce and treatment is difficult. You would need a definite diagnosis from your local extension service or a certified arborist, and treatment with a fungicide labeled for the fungus you have is usually done in the spring.
Spruce can also lose needles due to drought and many parts of the Northeast were dry this past summer and early fall. Sometimes drought works in combination with other situations such as spruce spider mites and the damage seen is a result of the two things combined. Yellowing needles on spruce can be caused by too dry, too wet, or soil that is too compact such as areas where recent activity from construction machinery have pressed soil into place.
If this spruce is recently planted, and it was a balled and burlaped plant, that too might be playing a role because B&B plants have had a great deal of their roots cut off, and the plant will drop the older needles if it doesn't have the root system to sustain all the plant.
If this is an important plant in your landscape you might want to have a certified arborist come and look at it.
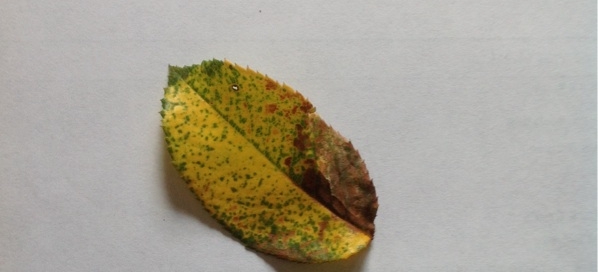
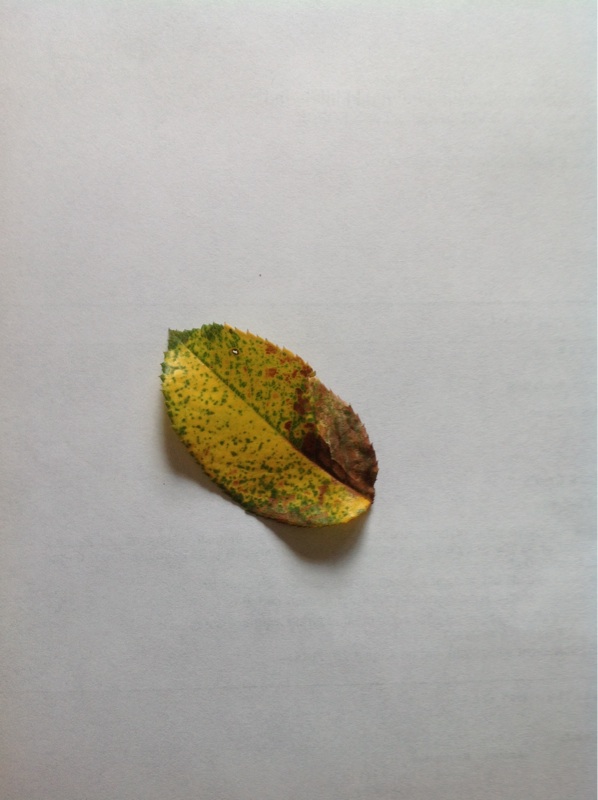
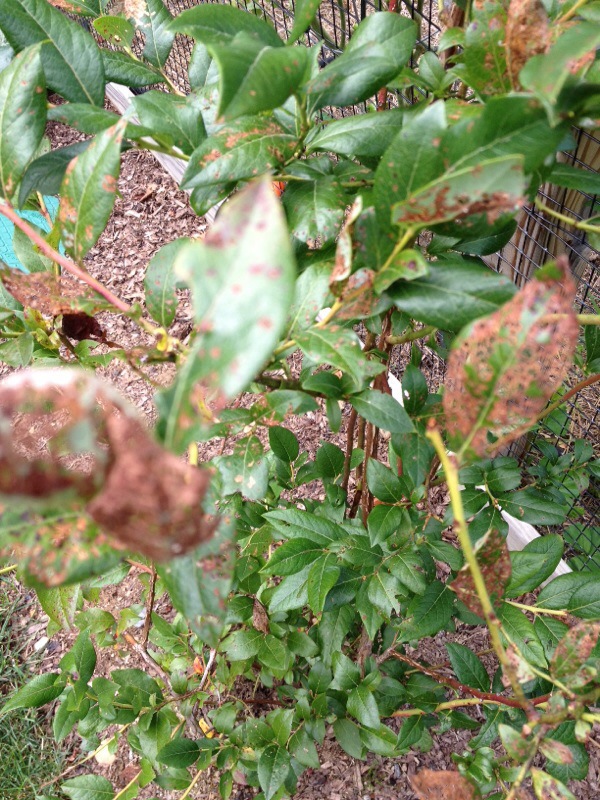
It's hard to diagnose a problem based on a photo of one leaf. There are so many variables and much depends on if ALL the leaves on the shrub look this way or only some of them. For example: If these are the oldest leaves (lower on the shrub) then yellowing leaves is a sign of drought stress. The plant has dried up in between waterings so it is shedding older growth in order to protect the new. If all the leaves are yellow that's often a sign of too much water and possible root rot. If the leaves have more brown spots than this one you've sent a photo of, that's a sign of black spot on roses, which is a fungal disease. Some roses are more prone to blackspot than others, and once the plant has the problem no fungicide will cure it, but will only protect (somewhat) the undamaged foliage.
In general, roses need to be watered deeply (not hand watering!) every four to six days depending on the temperatures. Water in the AM not in the evening and try not to get the foliage wet especially at night. Fertilize with a rose food according to directions and mulch to hold in moisture and add organic matter to soil - adding an inch of manure on top of soil in the spring is desirable. Start spraying with the fungicide of your choice early in the season (may) and continue according to directions.
That said, if you have a hybrid tea rose that's prone to diseases there is little you can do to protect it once something such as black spot has taken hold.
If you want more information send a shot of a couple of branches, plus one of the entire plant and we'll see if there is anything that we can expand on.
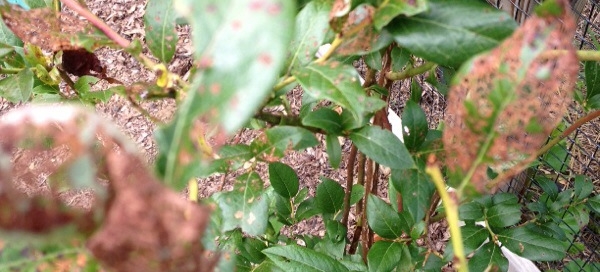
Leaf spot on a blueberry bush is an indication that something is wrong because these plants are pretty problem free normally. Here are some possible causes and what action you could take. You can think about which of these might apply to your plants.
1. Fungal leaf spot. Fungi usually cause leaf spot when a plant is hit with water frequently, either from irrigation, sprinklers, frequent rainfall, or consistent hand watering. When watering is under your control water deeply once a week but no more frequently and whenever possible don't hit the leaves with water. Soaker hoses are a good way to water - turn them on for a couple of hours once a week. Fungal problems are the most common cause of leaf spots on all plants. To protect the other, non-damaged growth you could spray with an organic fungicide such as sulfur or Serenade, but the most important thing is to alter watering practices.
2. The plant has been hit with something that damaged the leaf tissues when it fell. This could be a household cleaner, liquid fertilizer applied to the foliage, hot water from a sun-heated hose, or other garden chemical such as drift from an herbicide. The only thing you need to do is to water the plant well once a week and don't repeat whatever might have hit the foliage in the past.
3. Worst case? You don't know and will never know. Even experienced gardeners have this happen occasionally. Sometimes we see symptoms and we can't figure out what has happened. In such times we are well served to monitor the plants and not respond with anything other than our attention. In order to tell if the damage is still going on, mark some undamaged branches with a wire "twist-em" or colored yarn, and see if those marked stems and leaves remain unmarked. Water deeply once a week, prune off any dead wood, and otherwise don't apply any other products to your plant. Chances are it will be fine and may not show symptoms next year.
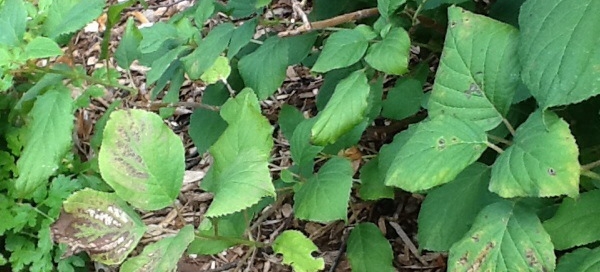
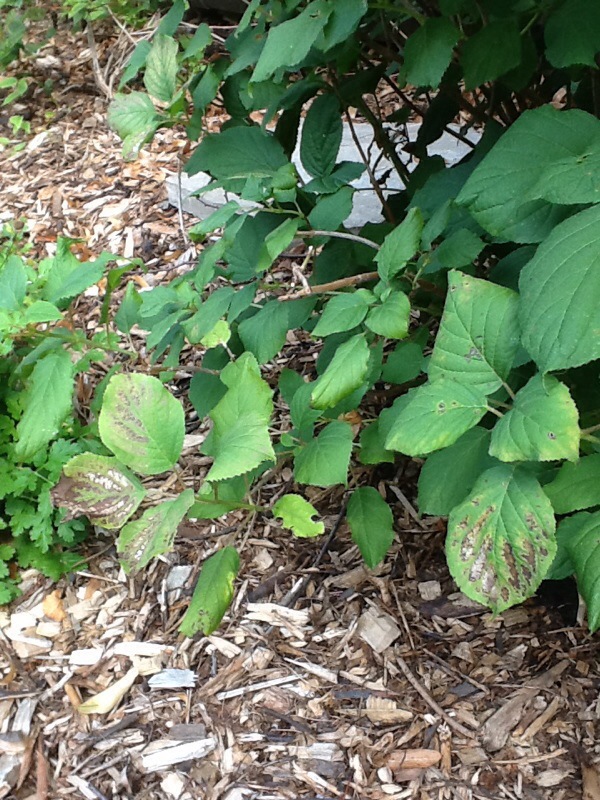
In this photo it looks like the damage is mostly on the bottom leaves near the ground, is that true? If so, that argues for something different that's going on in that area, such as the plant getting hit with a sprinkler that's watering a nearby lawn, for example. But whether the damage is seen just near the ground, or over the entire plant, there are several possible causes and you can think about what's most likely for your plant. (After the list we've also given you a recommended course of action even if you can't figure out what has caused this damage.)
1. Look under the leaves to see if there are small, green larvae (they look like worms) eating the tissue under the leaves. There are green "fruit worms" that sometimes eat the underside of hydrangea leaves, which causes the top tissues to brown and die. If you see any green larvae either pick them off and smash them, or spray the underside of the foliage with a product containing spinosad, an organic treatment that kills a wide range of larvae when eaten.
2. Fungus: the most common cause of leaf-spot on plants is a wide range of fungi. This is especially likely if parts of this plant are getting hit with water on a frequent basis, either by hand watering with a hose or a sprinkler system. Picking off the worst of the leaves and watering deeply less often (once a week) in the AM so that foliage has a chance to dry usually solves the problem. The good news is that leaf-spot fungus is usually just a cosmetic issue and doesn't kill plants.
3. Contact damage. This type of damage happens if foliage gets hit with something that kills the leaf tissues when it lands. Hot water from a sun-heated hose, liquid fertilizer mixed too strongly, cleaning products used to wash decks or windows, herbicides or drift from other garden products can all damage foliage. If this was the cause the damage won't continue unless what caused the problem also continues.
No matter which of these has caused your situation, picking off the worst looking leaves will help you to determine if the problem is still going on and will improve the look of the plant. If you suspect a fungal leaf spot you can use one of the organic fungicides such as Serenade, Actinovate or Sulfur, but that won't cure tissues that are already infected, it will only help to protect any undamaged leaves.
Know that most insects and diseases are very host-specific, so you don't have to worry that this is something that will "spread to everything else in the yard", which is understandably a common concern but not likely to happen.
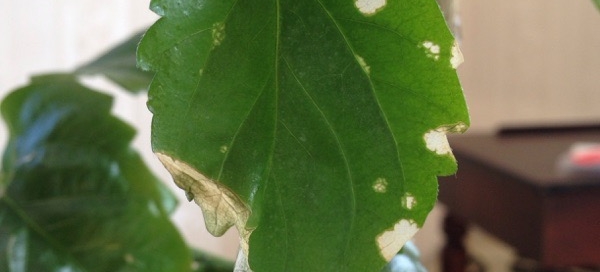
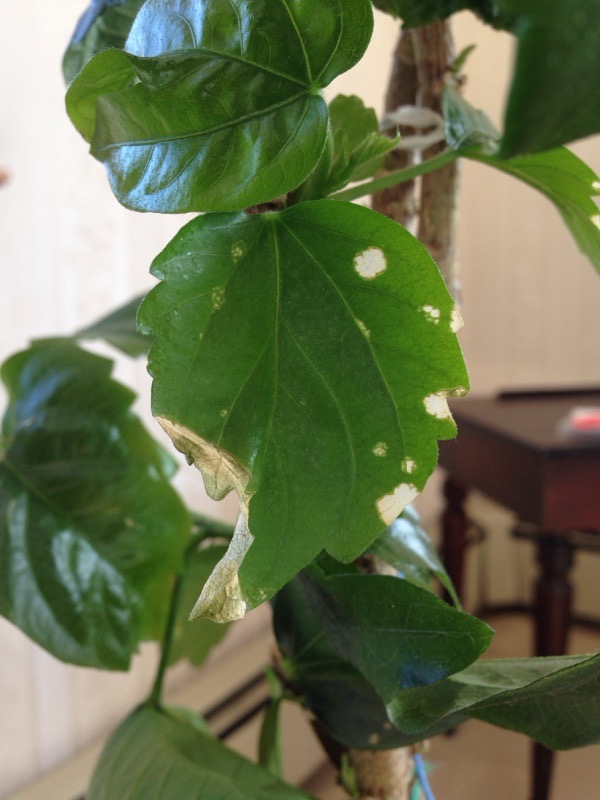
Although from seeing a photo one leaf it's difficult to diagnose a problem, here are our thoughts on your hibiscus plant:
1. This does not look like typical insect damage on an interior hibiscus. The most common insects on these plants are whitefly, aphids, or mites and this damage doesn't look like what those bugs do. So it's pretty sure we can rule out insect damage.
2. This also doesn't look like disease damage. Fungal diseases cause yellow or dark spots, not what we see in this photo.
3. From what we see this looks most like contact damage of some sort. Was this plant recently fertilized? If so you might be seeing fertilizer burn if the plant was fertilized when it was dry or given too strong a solution. Were any cleaning products used near the plant recently such as window cleaner? If so it's possible that the damage has been caused by such products hitting the leaves. Or was some other garden product sprayed onto the plant such as an insecticide or fungicide? Might something else have been dumped on the soil in the pot, or might a cat be using the plant for its litter box?
If you think this might be fertilizer burn be sure to water the plant really well by placing it in a shower or tub and running a great deal of water through the soil to wash out excess fertilizer salts.
Whether you figure out what caused these spots or not the treatment would be the same: remove the leaves that show these symptoms so you can monitor if the problem is still going on. Keep the plant in good shape as you obviously have been in the past - the other leaves we see are a good green color and look healthy.
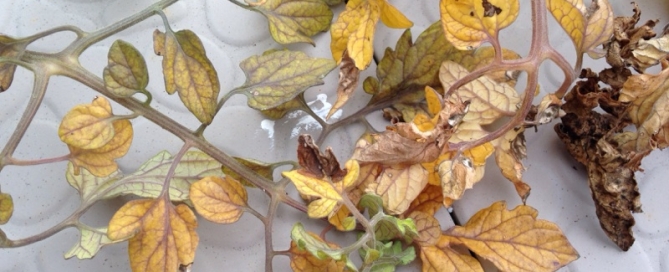
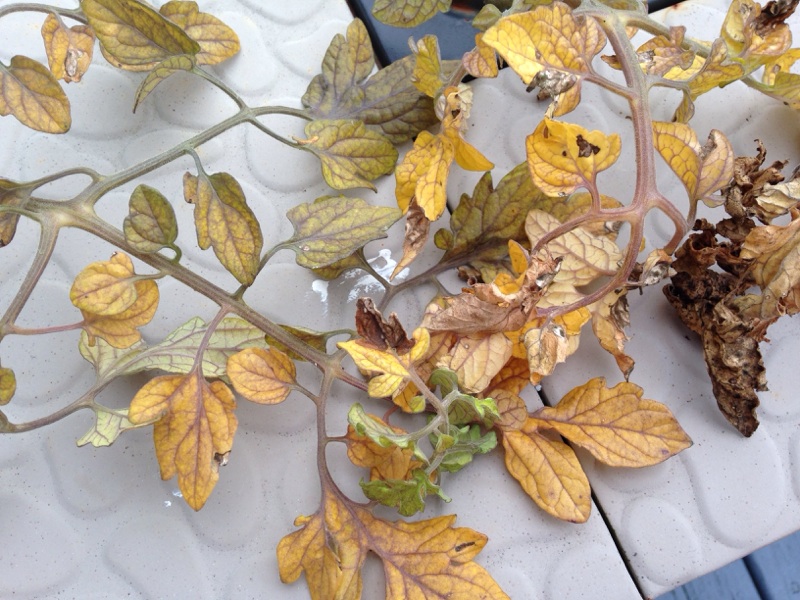
Before we talk about diseases, let's review general care for tomatoes. Leaves can turn yellow if tomatoes aren't getting enough nutrients from the soil. Since you are growing your tomatoes in pots, you need to fertilize regularly with a fertilizer suitable for tomatoes according to package directions. Yellow leaves can also be a sign of over- or under-watering. Make sure the containers aren't sitting in a pool of water and don't get so dry that they wilt.
There are several leaf diseases that tomatoes are prone to and without culturing in a lab it's hard to say which one is affecting your plants. This could be bacterial leaf spot, early blight, late blight or another fungal leaf disease.
That said, the treatment for the home gardener is the same:
1. Pull off the leaves that are spotted and/or yellow so the plant can be better monitored and some of the spores are removed.
2. Never get the foliage wet when watering. It's amazing how many people routinely spray the leaves of plants every evening because they think that they are somehow "refreshing" the plant. This is a prescription for every leaf disease in the book. Instead, water deeply less often, trying to do so in the morning so that the foliage has plenty of time to dry.
3. Start spraying immediately with a copper fungicide - this is an organic treatment that is a bit stronger than other organic fungicides. If the garden is right next to a pond, lake or stream, however, do not use copper as it is toxic to aquatic life. (In such cases I would use Actinovate, a natural bacteria.) Spray under the leaves and the stems too. Although the fungicide won't "cure" the problem it can protect the newer growth long enough so that tomatoes can be harvested. Next season start spraying early first using something like Actinovate or Seranade, and switching to the copper once the plant has a problem. (Do not alternate these - the copper will kill the bacteria in the other two products.) Always start with the mildest of treatments for plants.
4. Next season mulch your plants as soon as you plant them so that no fungal spores will splash up on the foliage when it rains.
5. Many people ask if they can "treat the soil" to get rid of such diseases, but most are not only soil-borne but also wind-borne so usually it's not helpful to apply a fungicide to the ground.
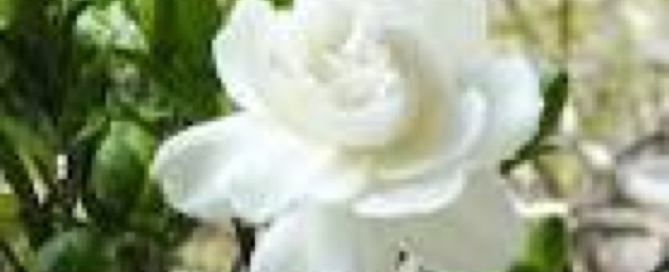
The cultural requirements of Jasmine (Jasminum polyanthum) are simple but exacting. When your plant arrives, put it in a cool room and set it in a window that receives bright light but little or no direct sun. Flowers will open and last longer with cooler home temperatures.
Jasmines are also sensitive to the dryness created by radiators, hot-air vents, and wood-burning stoves. The best way to increase the humidity around your plants is to run a humidifier nearby. You can also set plants in trays filled with pebbles or gravel. Add water to a level just below the tops of the pebbles (if the potting mix in the pots comes in contact with the water, the mix will draw water into the pot, which will cause the mix to become saturated, eventually leading to rot). Refill trays frequently to replace water lost through evaporation. (Our Humiditrays perform the same function without the need for pebbles.)
Water only when the top half inch of the potting mix is dry to the touch; Jasmine won't tolerate soggy potting mix. If these conditions are met, flowering generally begins in late January or early February.
After bloom, give your plant at least 6 hours of direct sun and normal room temperatures. When the danger of frost has passed, we recommend that you set the plant outdoors for the summer, shifting it gradually from a shady spot to full sun. Fertilize every 2-4 weeks during the growing season -- generally from early spring to early fall. Withhold fertilizer entirely during fall and winter, when the plant is resting. Use a water-soluble fertilizer designed for houseplants mixed at just half the rate suggested by the manufacturer. As with watering, plants suffer if overfertilized.
Prune as necessary to control size or to maintain shape, but stop pruning by August 1, because the plant sets flower buds in late summer.To encourage the formation of flower buds for next winter, be sure your plant experiences the cooler temperatures and shorter days of early autumn. The plant needs 4-5 weeks of nighttime temperatures between 40° and 50°F, plenty of sunlight, and the complete absence of artificial light after sundown. Bring the plant indoors before frost. Then give it cool temperatures and indirect light until it blooms again in late winter.
