Powdery Mildew On Zucchini

/Powdery Mildew On Zucchini/

Powdery Mildew On Zucchini

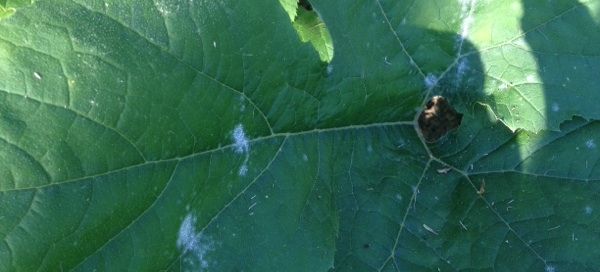
This may be environmental damage. Leaf spot such as you see can be caused by something physically hitting the plant, a fungus, or a bacteria. A physical cause would be something such as hot water from a sun-heated hose, a cleaning product such as window cleaner, a fertilizer spray or drift from an herbicide or other garden product. If this is the cause the damage doesn't spread and there is no threat to the plant.

However, if you see it spreading and getting worse, it is probably powdery mildew. This fungus is common to squashes, especially if the foliage is wet at night. Drier weather will help, but if many leaves are affected, fungicide sprays will arrest its progress and allow you to harvest.
Trim off the damaged leaves. There are several organic fungicides that are labeled for powdery mildew including Actinovate, Serenade, sulfur, and Green Cure, or ask at your local garden center. Be sure to spray under the leaves and the stems as well.

The warm days and cool nights of late summer create an ideal climate for spore growth and dispersal.

Powdery mildew can be prevented, and it can be controlled once it appears, but it can't be cured. The key to preventing it is planting mildew-resistant or mildew- tolerant varieties. Resistant varieties get less mildew than susceptible varieties; tolerant varieties may get some mildew, but it shouldn't affect the performance of the plant. Prevention also includes siting plants where they will have good air circulation, and exposing as much leaf surface as possible to direct sunlight, which inhibits spore germination.

Other methods of coping with it: pick off affected plant parts and either compost them in a hot compost pile or bag them tightly and put them in the trash. Or create a spray of 1 part milk with 9 parts water and spray the stems and tops of leaves with the solution. Reapply after rain.
By | 2017-09-11T15:49:33-07:00 November 27th, 2015|Plant Diseases|0 Comments

Maple With Mildew End Of Season

Planting this into the ground would be the most important way to improve the health of the tree. Be sure that it has been planted with the root flare showing above the soil line. The root flare is where the trunk spreads out to the roots, and this should be above the soil - maples are especially sensitive about this and will sulk or die when the trunk is buried too deeply. If you go to Google Image and type in "tree root flare" you will see examples of this.

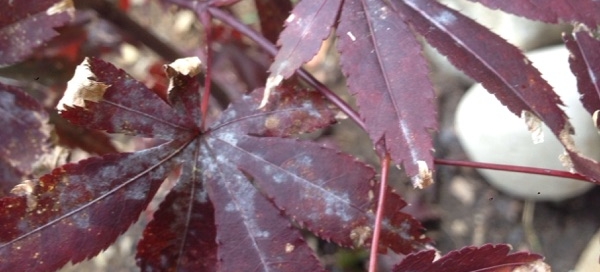
Don't worry about the mildew. In the northeast it was a bad mildew year because we didn't have that much rainfall this past summer. Also, at this time of year as the plants are "closing up shop" for the winter various leaf diseases become more pronounced. These plants will drop leaves soon, and just be sure to clear mildewed leaves out of the garden so that the spores don't linger around the plant for next year.

Maples commonly get leaf scorch on their edges when they dry up in between waterings. To help prevent this once your tree is in the ground mulch to a foot beyond the dripline every year using an inch of bark mulch but no more. Don't pile mulch against the trunk - keep it back at least 5" from the trunk. Water the plant once a week using a sprinkler or soaker hose (not hand watering) if it doesn't rain.

Maples, and trees in general, don't usually need fertilizer but do benefit from organic matter placed on top of the soil - compost, composted leaves, bark mulch etc.

By | 2017-09-11T15:49:33-07:00 November 27th, 2015|Trees|0 Comments

Tomato Troubles

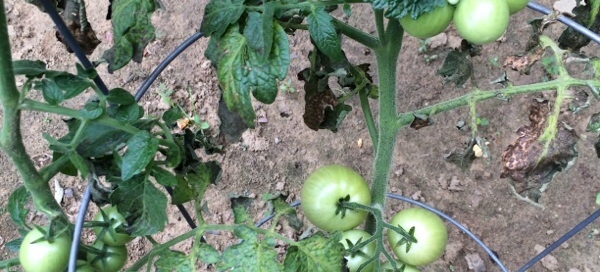
Your plants show several symptoms which may be coming from more than one source. The yellowing on some of the leaves might be from the early stages of a fungal infection (more about that below) or it could be insect or mite damage. Look under these leaves to see if the underside looks dirty, a sign that a sucking insect such as aphids, white fly or mites have been at work. If you see this, or the presence of insects, spray with insecticidal soap on the underside of the leaves.

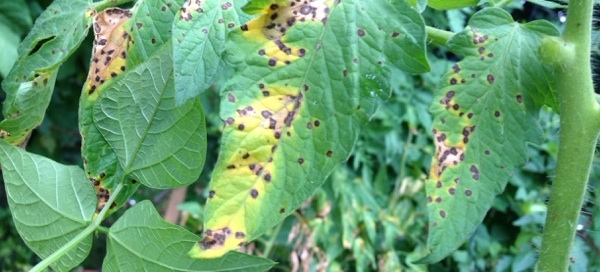
Blackened leaves: There are several leaf diseases that tomatoes are prone to and without culturing in a lab it's hard to say which one is affecting your plants. This could be bacterial leaf spot, early blight, late blight or another fungal leaf disease.

That said, the treatment for the home gardener is the same:
1. Pull off the leaves that are spotted and/or yellow so the plant can be better monitored and some of the spores are removed.
2. Never get the foliage wet when watering. It's amazing how many people routinely spray the leaves of plants every evening because they think that they are somehow "refreshing" the plant. This is a prescription for every leaf disease in the book. Instead, water deeply less often, trying to do so in the morning so that the foliage has plenty of time to dry.
3. Start spraying immediately with a copper fungicide - this is an organic treatment that is a bit stronger than other organic fungicides. If the garden is right next to a pond, lake or stream, however, do not use copper as it is toxic to aquatic life. (In such cases I would use Actinovate, a natural bacteria.) Spray under the leaves and the stems too. Although the fungicide won't "cure" the problem it can protect the newer growth long enough so that tomatoes can be harvested. Next season start spraying early first using something like Actinovate or Seranade, and switching to the copper once the plant has a problem. (Do not alternate these - the copper will kill the bacteria in the other two products.) Always start with the mildest of treatments for plants.
4. Next season mulch your plants as soon as you plant them so that no fungal spores will splash up on the foliage when it rains.
5. Many people ask if they can "treat the soil" to get rid of such diseases, but most are not only soil-borne but also wind-borne so usually it's not helpful to apply a fungicide to the ground. Additionally, a fungicide applied to the ground would kill of the "good guys" as well as anything harmful, ultimately making conditions worse since nature's balance would be upset.

By | 2015-11-27T20:34:00-08:00 November 27th, 2015|Vegetable Plants|0 Comments

Hydrangea Problem

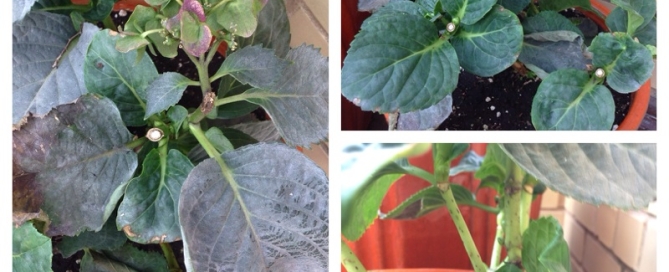
Hydrangeas do best in partial shade and may burn if receiving high heat or light intensity, so you were right to move it. There are, however, many more adjustments you'll have to make to keep your hydrangea healthy. 1) It needs a bigger container. This is probably not the source of your problem, but if you want the plant to live more than on year it will need a larger container with a greater soil volume. I grow hydrangeas for clients in containers as large as 24" x 24". Your plant doesn't need that yet, but it will need a bigger container next year. 2) Hydrangeas need consistent soil moisture but their roots don't want to be always wet. You used the word topsoil. If your plant is really planted in topsoil, this is a problem. Professionals don't generally use topsoil in containers. it stays too wet too long and can lead to root rot. Promix is a lighter weight potting medium that may contain a little soil but is primarily composed of perlite, vermiculite, sphagnum moss, and humus. If your plant is truly planted in topsoil (not promix) you should repot it before winter. 3) How much water are you giving it each time you water? To encourage healthy root growth throughout the pot you need to water thoroughly each time. That means water until water runs out the bottom of your pot. You will want to water when the top half inch of potting mix is dry. Depending on the temperature and rainfall this might be every day, every other day, or twice a week. There is no set schedule...you need to feel it. 4) If you don't already know, you should try to find out what kind of hydrangea you have. We can't tell you this from the photo, but it looks like you may have the kind of hdrangea that is sold as a short-term gift plant around mother's day. The original seller may not know the species or variety but it's worth asking. If this is what we call a florist's hydrangea it may not be winter hardy in this area and won't come back next year.

By | 2017-09-11T15:49:33-07:00 November 27th, 2015|Shrubs|0 Comments

Dried Fern

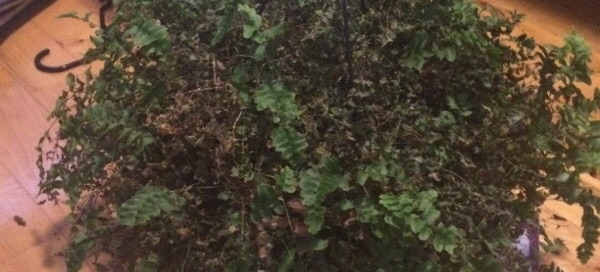
Your fern (looks like it may be a Boston fern although the photo is a bit blurry and dark so it's hard to be positive) has dried up. Ferns need an even level of moisture in the soil at all times. At this time of year that can be more difficult because as it gets colder outdoors our heat comes on more frequently and so the plants dry up more quickly. Also, when a plant has been in the same pot for a long time, and yours clearly has, the roots become so thick that there is little space in the root ball to retain water. So this is a plant that would probably benefit from putting it in a larger pot. It could go in a standing pot instead of a hanging basket at this point.

The bottom line here, is can this plant be saved, or should you try and save it? Sometimes people have trouble "saying goodbye" to a plant. There are two ways you can go when a plant reaches this point, and neither one is the right way...you'll have to decide which is the right way FOR YOU.

1. You can thank a plant for coming and toss it out, and get another plant. If you compost, you will know that the plant will be adding richness to your soil.

2. You can cut out all the dead foliage, put the plant in a larger pot with new potting mix, and water it more. After it gets used to the new container (be sure all containers you use have a drainage hole and don't put any rocks etc in the bottom of the pots no matter what someone else might tell you. Use only soil and never cover a drainage hole with anything.) you can start to fertilize.

By | 2015-11-27T04:18:50-08:00 November 27th, 2015|House Plants|0 Comments

Amaryllis

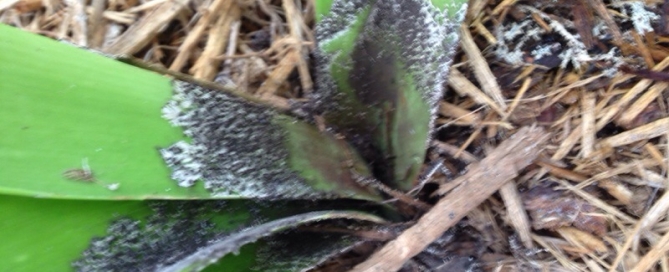
Now we see the problem with better definition -- it appears that your bulb is the problem and has grown up to the foliage. We recommend that you dig the bulb up and inspect. If the bulb is infected we recommend it be thrown out -- these kind of diseases can race through a garden in no time at all and this one of the most serious diseases found in any garden. If by chance this is a very expensive bulb or has some personal significance to you, remove the infected parts of the bulb with a sharp knife to healthy tissue and then dip the bulb into a bleach solution of 15:1 (water/bleach) for fifteen seconds, let it air dry and replant in a container (do not re-introduce this to the garden) with good potting soil. The soil where the bulb was growing is also contaminated at this point. Take the remaining bleach mixture and pour over the area where the bulb was growing and allow to dry. This will kill any remaining fungus. You can replant the space in a few days with something else. We don't mean to cat dispersions on your bulb's heritage, but often these serious bulb rot problems arise from inadequate sanitary conditions found in some companies that sell bulbs. Re recommend that you carefully inspect any bulbs you purchase and be certain they are firm (not squishy like a bad onion). Peel the brown covering off (this won't hurt the bulb) to be certain the bulb white and not discolored. Culturally you can decrease watering, increase air circulations, and buy only healthy bulbs. If you have any further question please call me at Leu Gardens, Orlando, 407-246-2625 for further discussion.

By | 2017-09-11T15:49:33-07:00 November 27th, 2015|Bulb Plants|0 Comments

Climbing Hydrangea

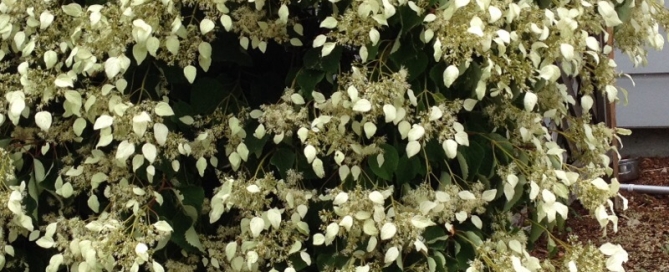
Best grown in rich, fertile, moist but well-drained soils in part shade to full shade. Tolerates full sun only if grown with consistently moist soils. Somewhat intolerant of the hot and humid conditions of the deep South, and typically will not thrive in USDA Zone 8. Slow to establish, but quite vigorous thereafter. Propagate by seeds or stem cuttings.
Hydrangea anomala, commonly known as climbing hydrangea, is a vigorous, sprawling, deciduous, woody vine that clings and climbs by twining and aerial rootlets along the stems, typically maturing over time to 30-40’ long. Horizontal lateral branching often extends several feet beyond supporting structures. Unsupported vines sometimes will grow in the form of a mounding shrub to 3-4’ tall, sprawling along the ground like a ground cover eventually covering an area of up to 200 square feet. This plant is native to wooded valleys, stream banks and mountain slopes in the Himalayas and China.
Fragrant white flowers in flat-topped clusters (to 8” wide) bloom in late spring to early summer (May-June). Each flower cluster consists of non-showy, creamy white to greenish-yellow fertile flowers in the center surrounded by showy white sterile flowers. Dried flower heads are reddish brown. Exfoliating bark on mature stems is also reddish brown and attractive in winter. Fruit ripens in September-October. Flattened clusters (corymbs 6-10” wide) of fragrant, white flowers in a lacecap configuration (small creamy white to greenish yellow fertile flowers in the center with a marginal ring of showy white sterile flowers) bloom in late spring to early summer (June-July). Fewer than 10 stamens per flower. Exfoliating, reddish brown bark of mature plants is attractive in winter. Once established, this vine can develop a somewhat bushy habit, with lateral branches growing out several feet from the support structure, thus giving the foliage a somewhat tiered effect.

By | 2017-09-11T15:49:33-07:00 November 26th, 2015|Vine Plants|0 Comments

Gardenia Problem

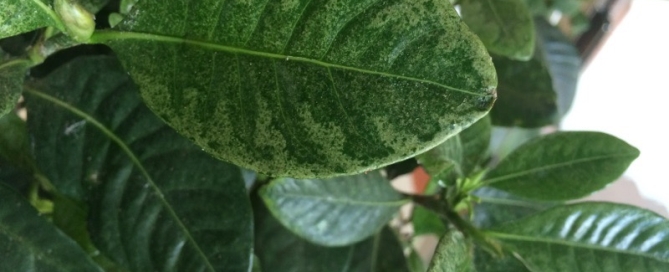
Gardenias are notoriously difficult to grow in normal indoor conditions. Look for signs of insect infestation such as sucking insects - aphids, scale or mealybugs - or spider mites. We think we see some signs of insects on the surface of the leaves pictured at the top right but the photo pixilates when we try to expand the photo and so cannot be sure. Take a few of the affected leaves to your local garden center for confirmation of the problem and recommended control. If it is a sucking insect such as scale, aphids or mealybugs, they can be washed off by hand or if the infestation is extensive, a horticultural oil can be used as a suffocant. You can even use a q-tip dipped in alcohol to wipe away aphids or mealybugs, but rinse with water afterwards.
In the meantime, here are a few care tips: They like bright light, but avoid direct sunlight, especially during summer.Water:Keep soil continuously moist, but reduce watering in the winter.
Temperature: Above 60ºF is preferred. Avoid cold drafts if temperature drops lower.
Soil: Use a nonalkaline soil mix, such as a rhododendron mix. They prefer slightly acidic soil.
Cold temperatures and inconsistent watering, which will cause bud and leaf drop. A well-tended gardenia will be compact, with deep green leaves, and bloom in the late summer, when the nighttime temperatures are above 60ºF/15.55 celsius and daytime temps are between 75ºF and 82ºF. or 23.88 to 27.77 celsius.

By | 2015-11-26T17:01:51-08:00 November 26th, 2015|Shrubs|0 Comments

Bacterial Leaf Spot Early Blight Or Other Fungal Issues Tomatoes

From the leaf alone we can't tell if this is a bacterial or fungal problem. There are several tomato leaf diseases that look similar and the only way to tell for sure is to have the leaves cultured in a lab. That said, for the home gardener the treatment would be the same. Since fungal problems are FAR more common than bacterial problems in the northeast, it makes sense to treat this as if it is a fungus. If it's bacterial the problem will rapidly continue and there's nothing you can do, but if it's fungal you can slow the spread so you'll still get tomatoes so what have you got to lose?

Start spraying now with an organic fungicide. Early in the season, before the plant has a problem the products of choice are the biological fungicides such as Actinovate and Serenade. But once a plant has a problem you should go right to the "heavy hitter" of organic fungicides, copper. Ask at your local garden center for a copper fungicide and use it according to directions. Most people find that a weekly application of copper will halt or slow an infection enough to allow the ripening of fruit for three to eight weeks.

Be sure to put the foliage of these plants into the garbage or the burn pile, not into the compost. Next year start spraying your plants regularly with Actinovate or Serenade from planting on...it's easier to stall the problem than it is to treat it once the plant is infected.

Also, be sure to water your plants in the morning only and try not to get the foliage wet when you do so. Frequently sprinkling the foliage with water is a prescription for leaf spot diseases. Water deeply less often.

This summer's cool weather has contributed to tomato leaf and fruit diseases.

By | 2015-11-13T20:36:48-08:00 November 26th, 2015|Plant Diseases|0 Comments

Palm Rot

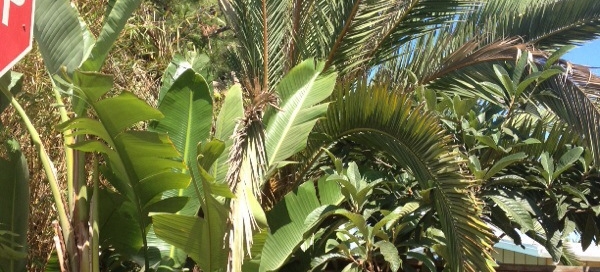
This may be Pink Rot, which leads to Fusarium Wilt. This is a common and devastating palm issue in Southern California, It's more problematic in Coastal Communities. Here is some info: http://ucanr.edu/sites/sjcoeh/files/77094.pdf
There is lits of information online about the disease and how to recognize it. Usually the half a front is living and the other half is dying is the best cue. There are no other issues that would cause half the palm fronds leaflets to die.
If it is this disease there are no cures. It would have to be carefully removed to not spread more spores throughout your area. It is best to have the county entomology office sample it in their lab for positive ID. There is a trick to test it in the field, but not as good as a formal lab test. If you cut a piece of the area that appears to be diseased, but still has living tissue put it in a a ziplock bag and seal tightly. Keep it in a shady location for a couple of days and watch the cut side of the palm tissue daily. If it has Pink Rot it will change from a white or cream colored tissue to a pink or peach color. It is carried in the wind and can enter a palm from simply cutting fronds. Its always best to only prune dead palm fronds as cutting living palm tissue will expose them to this deadly disease. Many chainsaws spread the disease since they can't be sterilized properly like hand saws can be. It can take many years before a Palm shows systems and dies. Sometime so much time goes by that understanding it was from a trimming years ago that infected it isn't always realized.
It would be best to contact your county entomologist or university cooperative extension office for further help and positive identification.

By | 2015-11-13T20:36:12-08:00 November 26th, 2015|Plant Diseases|0 Comments