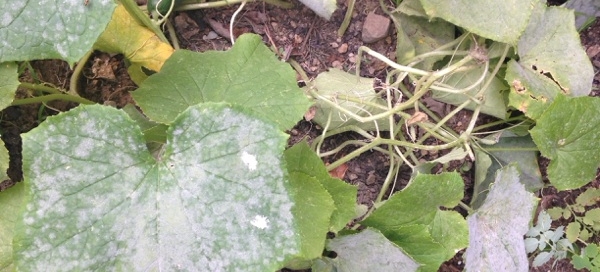
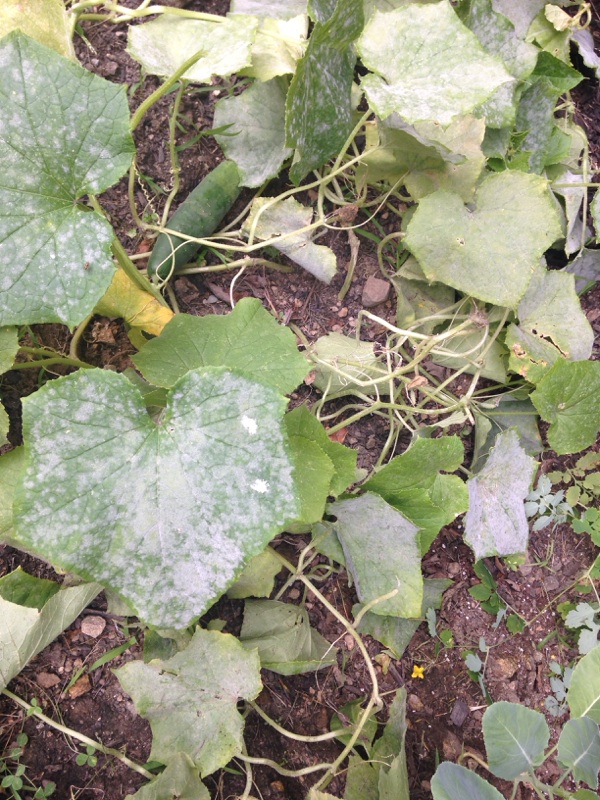
Powdery Mildew On Zucchini
It is probably powdery mildew. This fungus is common to squashes (and cucumbers, which are in the same family), especially if the foliage is wet at night. Drier weather will help, but if many leaves are affected, fungicide sprays will arrest its progress and allow you to harvest.
Trim off the damaged leaves. There are several organic fungicides that are labeled for powdery mildew including Actinovate, Serenade, sulfur, and Green Cure, or ask at your local garden center. Be sure to spray under the leaves and the stems as well.
The warm days and cool nights of late summer create an ideal climate for spore growth and dispersal.
Powdery mildew can be prevented, and it can be controlled once it appears, but it can't be cured. The key to preventing it is planting mildew-resistant or mildew- tolerant varieties. Resistant varieties get less mildew than susceptible varieties; tolerant varieties may get some mildew, but it shouldn't affect the performance of the plant. Prevention also includes siting plants where they will have good air circulation, and exposing as much leaf surface as possible to direct sunlight, which inhibits spore germination.
Other methods of coping with it: pick off affected plant parts and either compost them in a hot compost pile or bag them tightly and put them in the trash. Or create a spray of 1 part milk with 9 parts water and spray the stems and tops of leaves with the solution. Reapply after rain.
